There are plenty of blogging platforms, such as Ghost, WordPress, Drupal etc. But if you don’t need a full-blown CMS, making your own blog can be straightforward and very rewarding.
Wide Angle Analytics, and its parent company, Input Objects, took the latter approach. With the team having an engineering background, we decided that git and Markdown is a great and robust combination.
We settled on Nuxt, a framework on top of our favourite JavaScript library, Vue.js.
After ironing some quirks, we can safely say: it is glorious.
- How to set up Nuxt for a superfast blog?
- Writing metadata rich content?
- How to list blog articles?
- Making our blog SEO friendly
- The trailing slash conundrum
- Measuring engagement with web analytics in Nuxt and Vue.js
Let’s get to it!
How to set up Nuxt for a superfast blog?
We will start with Nuxt. With the recent release of Nuxt3, we would strongly suggest starting with this version. It is based on Vue3, which ships with many improvements over the older version.
Nuxt.js, aka Nuxt2, is still a valid choice, especially if you require certain modules which are Vue2 dependent.
Why use Nuxt and not just vanilla Vue3?
This question arises rather frequently. Vue3 is a great framework, but it is also quite bare-bones. Nuxt, on the other hand, comes with few bells and whistles such as:
- Component Auto-Import enabled by default; this removes a lot of boilerplate.
- Directory structure that, by convention, simplifies adding plugins, middleware, assets, etc.
- Ecosystem of modules, of which the Content will be the most useful for us.
- SEO utilities baked in.
- Static site rendering.
We placed static site rendering in the last position but in fact, it is one of the biggest selling points of Nuxt for SEO friendly blogs. Nothing beats serving static HTML, which can be easily cached and distributed by a global CDN.
The core application setup
Install Nuxt
> npx nuxi init blog
For detailed instructions, follow official documentation.
Add Content module Add @nuxtjs/content to development time dependencies
blog$ npm install --save-dev @nuxt/content
Enable the Content module, in nuxt.config.ts
export default defineNuxtConfig({
  // ...
  modules: ["@nuxt/content"]
  // ...
}
While at it, we would also recommend adding rehype extensions, which will be helpful a bit later
blog$ npm install --save-dev remark-directive remark-gemoji rehype-external-links
We will enable these later when we discuss Markdown content generation and its impact on SEO.
Add and enable TailwindCSS, our CSS toolkit of choice.
blog$ npm install --save-dev autoprefixer postcss tailwindcss
Now, create blog/assets/css/tailwind.css file with the following initial content:
@tailwind base;
@tailwind components;
@tailwind utilities;
And initiate Tailwind configuration
blog$ npx tailwindcss init
This last command will generate a tailwind.config.js file. We will have to augment it to support our Nuxt application. We need to instruct the Tailwind post processor which files and locations ought to be analysed when compiling the final CSS package. You do this by listing folders and locations to scan, like this:
module.exports = {
  content: [
    "./components/**/*.{js,vue,ts}",
    "./layouts/**/*.vue",
    "./pages/**/*.vue",
    "./plugins/**/*.{js,ts}",
    "./nuxt.config.{js,ts}",
    "./app.vue"
  ],
  // ...
And with that done, let’s finally enable our CSS in the Nuxt app, by adding it to the nuxt.config.ts file:
export default defineNuxtConfig({
  postcss: {
    plugins: {
      tailwindcss: {},
      autoprefixer: {}
    }
  },
  css: ["@/assets/css/tailwind.css"],
  // ...
}
What have we accomplished so far?
- Installed Nuxt3
- Added and enabled Content module
- Installed useful plugins for Content
- Installed and enabled TailwindCSS
That’s it for the basic setup. Nuxt will automatically generate a static site when the generate task is run. Deploying it is no more complicated than uploading content to an HTTP exposed folder. But more on this later.
Now, it is time to review the directory structure and start adding useful content.
Directory Structure
The Content team provides great and detailed documentation about the conventions adopted by the framework. Check the orignal source for more interesting use cases. For our SEO blog purposes, we will focus on just a small selection of available artefacts.
/content
  /articles
/pages
  /articles
    index.vue
    [slug].vue
  index.vue
/assets
  /css
  /images
/public
  /images
    /icons
    /articles
  /fonts
  favicon.ico
  .htaccess
  robots.txt
app.vue
At the first glance, this might look like a lot, so let’s dissect it based on the function they serve.
- Article Content – we place article content, in Markdown format, in
/content/articles - Article Page – a blog article presentation will be defined by rendered Markdown wrapped in Vue page, in
/pages/articles/[slug].vue - Article List – you can build your own article listing, including pagination, by crafting a Vue template in
/pages/articles/index.vue. With the Content module, you can fetch and query the article list anywhere in the application, but here we will make the assumption that there is a dedicated page that lists all the articles. - Static Assets, namely these that change infrequently and can be aggressively cached by CDN, should be placed in
/publicfolder. That’s the best place to store your application icons, logos and custom fonts. - Assets, other assets, especially these that tend to change more frequently, should be placed in
/assetsfolder. During site rendering, a unique hash will be appended to the file, giving it a unique file name. This allows you to safely deploy an application even when using CDN cache. Every visitor of your website will be served fresh and up-to-date content. For example, if you were to store your CSS file in the/publicrather than/assetsfolder, returning visitors to your blog might have their browser serve them the old file, ruining their experience. - Application entry, it all starts with
/app.vue. We will use this entry page to define common SEO and meta tags for every page and articles of our blog.
With that sorted, let’s dive into handling our content.

Writing metadata rich content
Writing article post will require knowledge of Markdown. Markdown is popular among developers and engineers, but don’t be scared. It is surprisingly easy to master. You can get proficient with Markdown after just a few minutes. Don’t believe us? Check this Getting Started guide.
Your first article
Create /content/articles/how-to-write-awesome-hello-world-sample.md file and open it.
There is nothing there! So let’s start adding some bits. First, let’s add some metadata. Metadata is just a fancy word for Data about data. The Content module defines certain standard metadata entries which we can extend further.
---
title: 'Title of the page'
description: 'meta description of the page'
draft: true
navigation: true
head:
  meta:
    - name: 'foo'
      content: 'bar'
---
Your article content goes here
In our case, we will modify our template slightly to standardize meta header generation. Our template will look as follows:
---
title: 'Title of the page'
description: 'meta description of the page'
published: true
keywords: [keyword1, keyword2]
date: 2023-03-22
enable_toc: true
cover: /image/articles/...
---
Your article content goes here
That’s in itself won’t do much, as we need a rendering page. Let’s make something fancy. Let’s build an article page that automatically creates a title section, highlights the publication date and adds a cover image.

Let’s build a template that will generate a page similar to the one above.
<template>
  <article class="max-w-prose mx-auto">
    <header clas="flex flex-col">
      <h1 class="text-center">{{ data.title }}</h1>
      <i class="text-sm">Published on {{ publishedDate(data.date) }}</i>
     <img :src="/images/articles/how-make-seo-friendly-blog-with-nuxt-and-vue/nuxt-seo-site-id.png" :alt="data.title"/>
    </header>
    <TableOfContents v-if="data.enable_toc" :value="data.toc"/>
    <ContentRenderer :value="data" class="article-content"/>
  </article>
</template>
<script setup>
const { params } = await useRoute();
const { data } = await useAsyncData(`article-${params.slug}`, () => queryContent(`/articles/${params.slug}`).findOne());

const publishedDate = function(date) {
  const d = new Date(date);
  return `${d.getFullYear()}-${d.getMonth() + 1}-${d.getDate()}`;
}
</script>
When users visit https://example.com/articles/how-to-write-awesome-hello-world-sample they will be presented with the output of the above component. It is not relevant whether it is pre-rendered or leveraging SSR.
The slug, that last part of the URL, will be used to look up the article. For each article, the built-in ContentRedender component will convert Markdown into an HTML.
We also introduced our own TableOfContents component. This one we have to build ourselves.
We can do it by creating a file /components/TableOfContents.vue with the following body:
<template>
  <nav>
    <h2>Table of Contents</h2>
    <span v-for="t in toc">
      <a class="news-headline" :href="'#' + t.id" :class="`pl-${t.depth}`"> {{  t.text }}</a>
    </span>
  </nav>
</template>
<script>
export default {
  props: ['toc']
}
</script>
We have now created a simple component, that will render any page that matches /articles/<SLUG> format and has respective content file /contents/articles/<SLUG>.md.
We use custom metadata, the article properties, to control if a Table of Content should be rendered. Not every article will have numerous sections or, for example, it won’t be desired to present ToC.
Furthermore, we also introduced our convention, to always add a cover image, based on the cover property in the header.
How to list blog articles?
Now it is time to create a blog landing page, where we will list all articles that have been published. The page will list these articles with fancy cover images, title, and publication date.
The list of the articles will be sorted by date of publication, with the most recent entries being on top. As it should be the case with every blog.
Fire up your text editor and open /pages/articles/index.vue. Here is an example how it could look:
<template>
  <div>
    <h1>List of Articles</h1>
    <section class="grid grid-cols-2 gap-8">
      <NuxtLink v-for="article in data" v-bind:key="article.slug" :to="`${article._path}`">
        <img :src="`${article.cover}`" :alt="article.title"/>
        <h2>{{ article.title }}</h2>
        <span>{{ article.date) }}</span>
      </NuxtLink>
    </section>
  </div>
</template>
<script setup>
const { data } = await useAsyncData('articles-home', () => queryContent('/articles').only(['title', '_path', 'date', 'cover']).where({published: true}).sort({date : -1}).find())
useHead({
  title: "List of Articles",
  meta: [
    { hid: "og:title", property: "og:title", content: "List of Articles" },
    { hid: "twitter:title", name: "twitter:title", content: "List of Articles"},
  ],
})
</script>
That component does exactly what we describe above. It will query the Content module for content under /artciles path and filter out those not yet published. As we are not rendering the full article, we select only relevant properties, such as title, cover image and date of publication.
The result of the query is sorted in descending order, by date, hence the -1 in the sort expression.
Our article listing is complete.
In this code, we also used added HTML metadata for the first time. The content of the object passed to useHead will be rendered in the HTML <head> element.
Which brings us nicely to actually adding Search Engine Optimization techniques to our blog.
Making our blog SEO friendly
The absolute minimum you have to cover is the
- title tag, which should match first, and only H1 tag on the page, and
- canonical link.
With Content module, you have a choice or using the built-in helper useContentHead or rolling your own. The former will take page information from title, description and head document properties.
Rolling your solution is not difficult and comes with a bit more flexibility, so that’s what we are going to do. We will start by modifying our article page component, the /pages/articles/[slug].vue. We only need to modify the <script> section:
<script setup>
const { params } = await useRoute();
const { data } = await useAsyncData(`article-${params.slug}`, () => queryContent(`/articles/${params.slug}`).findOne());
const content = await data.value;
const config = useRuntimeConfig();
useHead({
  title: content.title,
  meta: [
    { hid: 'description', name: 'description', content: content.description },
    { hid: 'keywords', name: 'keywords', content: content.keywords.join(',')},
    { hid: "twitter:title", name: "twitter:title", content: content.title},
    { hid: "twitter:description", name: "twitter:description", content: content.description},
    { hid: "twitter:card", name: "twitter:card", content: "summary_large_image"},
    { hid: "twitter:image", name: "twitter:image", content: `${config.public.baseUrl}${content.cover}`},
    { hid: "og:description", property: "og:description", content: content.description },
    { hid: "og:image", property: "og:image", content: `${config.public.baseUrl}${content.cover}` },
    { hid: "og:image:type", property: "og:image:type", content: "image/png" },
    { hid: "og:type", property: "og:type", content: "website" }
  ]
})
// ...
</script>
In the above example, we explicitly reference the configuration to create absolute links for various ontologies.
A keen eye will spot that the above snippet does not introduce the canonical link tag. That can be solved on a global level, as we want to have that information on every possible page, not just on the article page. For that, we will modify the application entry page, the /app.vue. Introduce the following <script> section.
<script setup>
const route = useRoute()
const config = useRuntimeConfig();
useHead(() => {
  const canonical = `${config.public.baseUrl}${route.path}`;
  return {
    link: [
      { hid: "canonical", rel: "canonical", href: canonical }
    ]
  };
});
</script>
The above snippet differs from the previous as we are not passing an object, but a callback function to the useHead helper. That’s important, otherwise the canonical link will remain unchanged as we move from page to page. By passing a callback, we provide a mechanism, for the HEAD section to be re-evaluated each time a page changes.
Note: You might have noticed that each entry in the useHead object has an extra parameter, the hid. We use this special identifier to de-duplicate entries. The meta tags with the same hid are replaced with the latest. If you omit, or change the hid value, a new tag will be appended, without affecting the previous value. In most scenarios, it is not recommended. Depending on the crawler, different tags will be picked up, resulting in poor search relevance. Your best bet is to stick to having just one tag of a given type, so keep hid consistent across pages.
Summary of what we achieved thus far is:
- We have created a page that renders each article, with optional Table of Contents
- The page populates with article-specific metadata in the
HEADof the page - Every page in our application, including every article, has a defined and consistent canonical link.
With that ready, let’s generate our static page.
blog$ npm run generate
The outcome will be your static website, with all the assets and static files copied to .output/public directory. Your article will end up as a static, pre-rendered HTML page in
/.output
  /public
    /articles
      /how-to-write-awesome-hello-world-sample
        index.html
Upload the whole folder using FTP to any HTTP server, and your site is up, happy to accept even crawlers that do not speak JavaScript.
And it will be really FAST!
Warning about links
A simplified rule of thumb says: if your website has an awful lot of outgoing, crawlable links, you will be penalized with a low ranking. In the worst case, you will be given a high SPAM score. That’s not good.
Likewise, visitors clicking on a link and going off on their merry way to an external website will tank your website engagement. Also, not good.
A solution to both these problems is to tag Markdown generated external links with nofollow and _blank target attributes. Links marked like this will tell Googlebot that you do not endorse these links, and they should not be crawled. You are telling the crawler to not follow these links.
The target, on the other hand, instruments the browser, to open the link in a new window or tab. Making it more likely for the user to go back to your website.
You can configure the Content module to automatically enforce both setting on external links. Add the following section to nuxt.config.ts:
export default defineNuxtConfig({
  // ...
  content: {
    markdown: {
      remarkPlugins: ["remark-directive", "remark-gemoji", "remark-rehype"],
      rehypePlugins: [
        "rehype-format",
        "rehype-stringify",
        [
          "rehype-external-links",
          {
            target: "_blank",
            rel: "nofollow",
          }
        ]
      ]
    }
  }
  // ...
}
Your Markdown links:
[Help me](https://exmaple.com/help)
will be generated as safe, SEO friendly HTML links:
<a href="https://example.com/help" rel="nofollow" target="_blank">Help me</a>
Oof. Almost there. There are just a few more thing left. Firstly, the trailing slash.
The trailing slash conundrum
For the sake of SEO, you want your links and canonical links consistent. It less important what these links are, than that they are consistent. What do we mean by this?
If your website links to the page /foo/bar and the browser URL is /foo/bar but your canonical link is /foo/bar/ (notice trailing slash), that’s not the most optimal solution. Google Bot will complain that the canonical it found, does not match the canonical link you advertise.
Same with sitemap. If you generate sitemap.xml with all the page links, which is always recommended, you want to make sure that all these match across browser window, canonical tag and the sitemap.
All this matters in the context of Nuxt, specifically because of the structure of generated content. Notice, in the previous section, the final file is, in fact, an index.html inside a folder.
Most HTTP servers, like Apache and Nginx, will treat it, correctly, as a folder and automatically append the slash. If you didn’t anticipate this in your sitemap or HEAD section, you are in trouble.
Our recommendation:
- Keep URLs without trailing slash
- Fix trailing slash on HTTP server level.
For example, in the case of Apache HTTP Server, it is enough to add .htaccess to the /blog/public folder, with the following content:
DirectorySlash Off

RewriteCond %{DOCUMENT_ROOT}%{REQUEST_URI}/index.html -f
RewriteRule ^(.*)$ /$1/index.html [L]
This rule will check if the current path, when appended with index.html points to an existing file. If yes, it will silently, without necessary redirection, serve the content of that existing HTML file.
Navigating to /foo/bar will result in /foo/bar/index.html being served, but the browser will keep showing /foo/bar in the address bar. It’s a win.
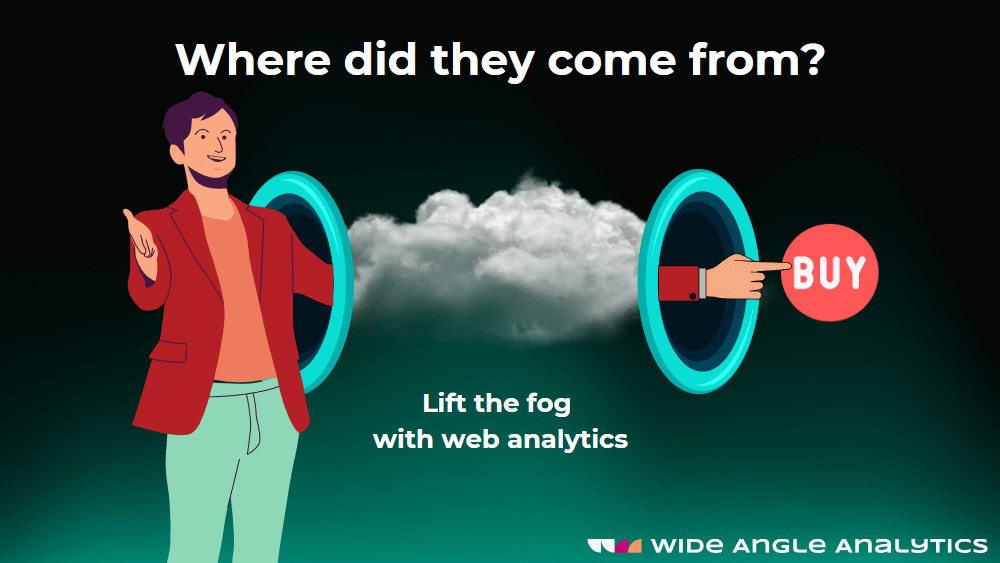
Measuring engagement with web analytics in Nuxt and Vue.js
Finally, it is time to measure the success of our blog. If you build your blog for commercial purposes, you would like to know which content resonates with which audience.
Perhaps your visitors from Twitter prefer content about Vue.js. Or maybe your newsletter audience values your business insight.
You can easily and reliably measure engagement and performance using tools such as Wide Angle Analytics. With its strict GDPR compliance, in the default configuration you won’t need a Cookie Banner. Add to that custom domain (available in every plan) and you can even avoid unfair Adblockers.
Start by creating an account and defining a site.
The easiest way to add tracker script in Nuxt, is to leverage the useHead helper we used before. In the /app.vue file, we can enrich our HEAD section with the Wide Angle Analytics script.
Copy the Site ID for the site details and paste it together with the rest of the script attributes.
<script setup>
const route = useRoute()
const config = useRuntimeConfig();
useHead(() => {
  const canonical = `${config.public.baseUrl}${route.path}`;
  return {
    script: [
      { src: "https://stats.wideangle.co/script/<Site ID>.js", async: "true", defer: "true"}
    ],
    link: [
      { hid: "canonical", rel: "canonical", href: canonical }
    ]
  };
});
What if you are not a developer
Arguably, the process described in this article is not palpable for someone who is not tech-savvy. The good news is that there are numerous CMS solutions, self-hosted and SaaS, to choose from.
We appreciate that not everyone wants to build their own publishing platform. That’s why we build dedicated web analytics plugins and guides for some most popular platforms available today. You try our official WordPress plugin, illustrated guide for Webflow, IONOS, Bubble, Squarespace and Wix. Check the full list in our documentation.
Summary
Pffeew, that was long. We hope you found it useful. If you followed along, in just few steps you:
- Created a new Nuxt project.
- Created blog content together with useful SEO properties.
- Created SEO friendly, static blog.
- Added web analytics to measure your blog’s success.
Next steps
Now it is time to store the project in a source control, for example git. Next time you want to add an article, add a Markdown file to /content/articles folder, regenerate output and upload the public output folder. That’s it.
No Cookie Banners. Resilient against AdBlockers.
Try Wide Angle Analytics!